Total Pageviews

Showing posts with label History. Show all posts

Saturday, February 2, 2019

Dyeing Fabrics


For this project we went to our local Hobby Lobby and picked up a canvas bag.  We were studying our Little House on the Prairie Unit Study and did a few projects as we learned different things about Laura Ingalls Wilder and how she lived. 

What you will need:

canvas bag/shirt/etc 
blueberries
candle
pan

Directions:

1-Bring the berries to a slow boil and let it simmer for about 30 minutes
2-Let cool 
3-while you are waiting it to cool, take a long stick candle and light it so that the wax starts to run.    drip it over your material to form a design and take a toothpick or cheap tiny paint brush and              smooth it out to the desired design
4-Let the wax cool
5-After the dye has cooled, drain the berries 
6-Dip your material into the liquid dye and let it sit for 15 minutes to an hour.  The longer you leave it in there, the darker the color will be 
7-Set aside on newspaper so it won't dye your counter tops and let sit until it is fully dry
8-wash inside out in cold water before using and/or washing with other clothes


Friday, June 9, 2017

Egypt Unit Study

Some kids learning styles are hands-on.  My daughter does better when she can see and touch it not just read words on the paper.  So I get a little creative when we do our school  We had a good time studying Egypt.  I used the Story of the World history curriculum.  It's geared towards younger Elementary, but I put unit studies with mine and made it a little more challenging.  We did lapbooks and projects with almost every lesson.  Our favorite was the mummified chicken.  Yes, I said MUMMIFIED CHICKEN (see other post for that project).  It was not as stinky as you would think or hard.  It is very time consuming because it takes 7 weeks to complete the process, but it is worth it.

Lapbooking:


Projects:

Ancient History Writing & Cartouche


Ancient Egyptian circlet/crown/diadem
We forgot to paint the cobra  :  ( OOOPS)  It still turned out pretty cute though.


Egyptian collar
You can make this out of poster board, cardboard or whatever you want.  I used the dollar tree foam sheets and just let her create her own design.  We punched holes in the corners to run string/yard through it so she could tie it around her neck.  


Egyptian hieroglyphics cave writing (stone tablet) 
Here we just used the salt dough recipe and added gritty sand like what you would have in a sandbox to make it have the texture and the color of the caves back then.  You can find the recipe here:  http://www.firstpalette.com/Craft_themes/People/hieroglyphic_stone/hieroglyphic_stone.html 


Egyptian amulet
This one was made out of a toilet paper roll, dollar tree modeling clay, rhinestones, and gold spray paint.  Our original plan was to make a whole outfit, but we never did get to doing the actual costume.


Egyptian Wig
Clearly this is a more than a one day job and I'm pretty sure we aren't doing ours like the picture, but we had a lot of laughs and my full of life girl enjoyed modeling it and acting silly.  To make this you cut several strips of black construction paper and wrap them around a pencil or dowel so they will curl up.  After you have curled them all use a piece of cardboard or poster board to wrap around your child's head and make a headband. Then you will glue, tape, or staple the strips to the head piece. 


Pharaoh sculpture
Although we joked this looked more like George Washington, she did a great job on it and spent some time on it.  She used a toothpick to carve out the details.  We just got the brown air dry, sculpting clay from our local Hobby Lobby.  If you google discount coupons for them online you can screen shot the coupon with the code on it and get it 40% off for a big box of clay.


We also did a project with toothpicks and marshmallows and she built it into a pyramid.  

Some of the art art projects were done to finish off the study.  Here is one that she cut up shapes to make a desert and the other one had several steps to complete the project.  (sorry about the red eyes in the picture)  The 2nd art we did was with newspaper and construction paper layered into an image.


When we were done with our Ancient Egypt study we took a field trip to a museum to visit the Egyptian exhibits and lucked up that they had a real mummy there.


After our trip to the museum we wanted to try Egyptian food.  This is as close as we could get in our area.  We tried mijadarah and tabbouleh.


Mummifying a Chicken

I was a little worried about this project in the beginning because I thought it would smell up the house.  Although it does have a little odor, it's not unbearable.  You can smell it a little bit but only when you pull it out of  the baggies and scrap off the old stuff to add the new to place it back in it's bag for another week.  It's really easy and only takes less than 10 min per week after the first week. This was one of the most fascinating hands-on projects we have done yet.  I wanted to make sure that while she was learning about the Ancient Egyptians burial traditions she would retain the information as well.  

With this project your child will learn how to write step by step instructions after as well as learn how to mummify a chicken the way the Ancient Egyptians mummified people.   You can have the students record each week the progress.  When the project is done I would have your child write a summery about what they learned and what their favorite part of the project was.  

You will need the following:
  • one store bought small chicken-raw (with liver and heart inside)
  • several containers of table salt (Egyptians used natron instead of salt)
  • several boxes of baking soda
  • 1/3 cup of cooking oil
  • 3 tablespoons of whatever kind of herbs you want to use.  We used cinnamon, nutmeg, and all spice.
  • box full of gallon size ziplock bags
  • gauze or cheese cloth cut into squares or long strips
  • beads
  • alcohol 
  •  jars if you want to do the liver and heart like they did (also optional)  We opted out of doing those.
  • baking pan
  • rubber gloves
  • mask (surgeon or painters kind)
  • paper towels 
  • bowl
  • small container of hardening solution (thinned out glue, lacquer, etc.)

Directions:  
-
Day 1:
  1. Step 1 – Unwrap and place the store-bought chicken on a baking sheet.
  2. Step 2- Take out the innards of the chicken and set aside.
  3. Step 3- Wash the chicken off with water then pat dry completely.    
  4. Step 4- Pour alcohol all over the inside and the outside of the chicken and pat dry.  Make sure you get down inside the chicken really good because it contains a lot of moisture.
  5. Step 5- Place on a baking sheet and fill the inside of the chicken with one box salt and one box baking soda.  (you will need enough to cover the whole chicken with) Once they are mixed put a good bit of the mixture inside the chicken where the innards were.
  6. Step 6- Then heavily rub the mixture on the top of the chicken, flip and repeat on the other side.  
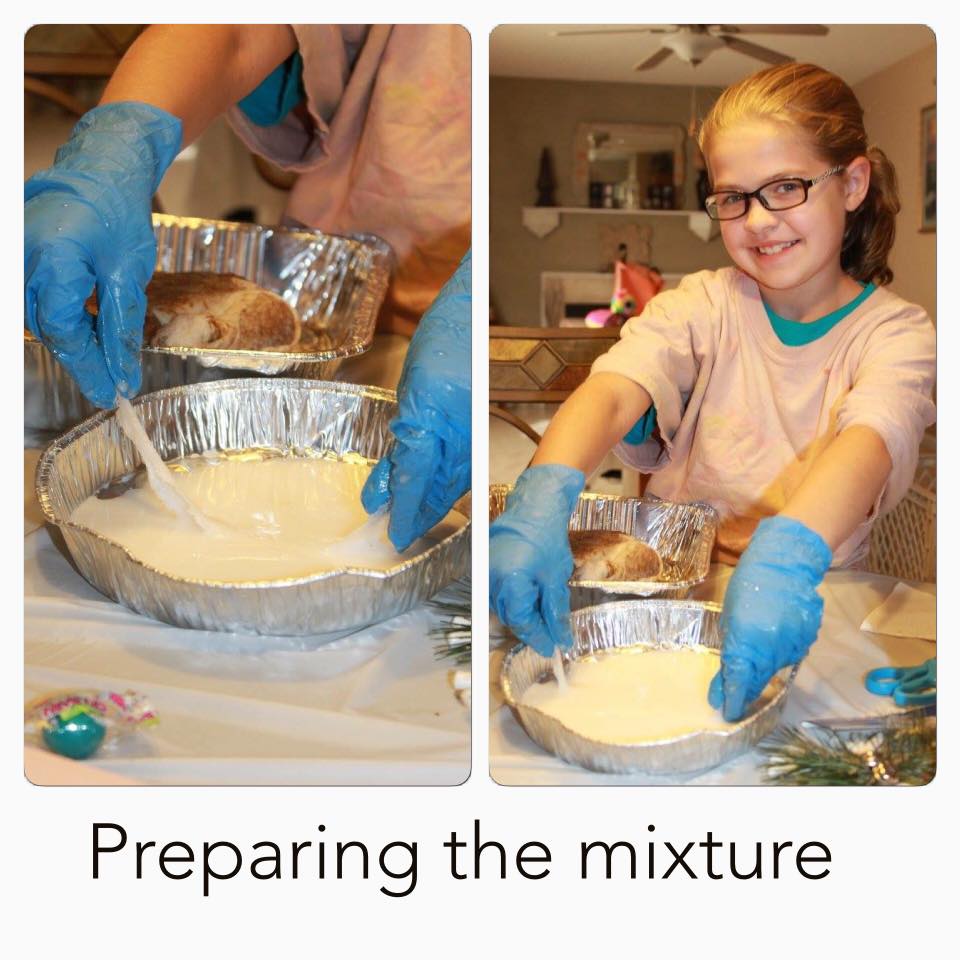
  7. Step 7- Open the Ziploc bag (I used two for a double seal). and pour the remaining mixture at the bottom and place the chicken in the bag and shake it to make sure the chicken is fully coated with the mixture.  
  8. Step 8 – Seal the bag and put it inside a second bag to make sure the air can't get inside the bag, then place the chicken in a bowl and sit on the counter. 

What do do with the innards?  We opted not to do them, but I did explain to her what the Egyptians did with them.  They would throw away the brains and other innards, but left the heart inside for Anubis (the Egyptian god of the afterlife and mummification) to find and weigh.  The heart was believed to be the seat of the soul.  They would remove, save, and mummify the intestines, stomach, lungs, and liver and put them in canopic jars for safekeeping.  All of which, it was believed, would be needed in the afterlife. 


 Day 2
  1. Step 1- Take the chicken out of the bag of salt and place it in an area designated for the salty chicken.  I put ours in the sink and remove the loose salt mixture from the inside and outside of the chicken with your hand.  Then pat down with paper towels any excess moisture that may still be on the chicken.  Be sure to wipe down the inside really good as well because it is hard to get all the moisture out of that area.  
  2. Step 2 – Discard used salt and bag.
  3. Step 3- Place on a baking sheet and fill the inside of the chicken with one box salt and one box baking soda.  (you will need enough to cover the whole chicken with) Once they are mixed put a good bit of the mixture inside the chicken where the innards were.
  4. Step 4- Place the chicken into a new ziplock bag and pour the mixture inside the the bag and shake really well to coat the chicken.  Make sure you get a lot of it inside the chicken.
  5. Step 5- Use a second ziplock bag and place the first sealed chicken into the bag and seal it.  
  6. Step 6- Set aside in a bowl for another week.

Week 1
 

Your mixture should be hard and and a little discolored by now.  (the salt is drawing out the moisture) 
  1. Step 1- Take the chicken out of the bag of salt and place it in an area designated for the salty chicken.  Wipe all the old salt mixture off the outside of the chicken and clean out the inside as well.    
  2. Step 2 – Discard used salt and bag.
  3. Step 3- Place the chicken in a new ziplock bag and pour the mixture inside the the bag and shake really well to coat the chicken.  Make sure you get a lot of it inside the chicken.
  4. Step 5- Use a second ziplock bag and place the first sealed chicken into the bag and seal it.  
  5. Step 6- Set aside in a bowl on the counter for another week

Week 2

Repeat the same steps as you did in week 2 for another 5 weeks.  The chicken will be heavy and really hard at the end of week 7 


Weeks 3-7
 
  
  Once the mummy is complete you will move to the next phase of the burial process.  

  1. Step 1- Clean all the salt mixture off the chicken
  2. Step 2- Mix the cooking oil and spices together and run on the chicken
  3. Step 3- Wrap the chicken with the cheese cloth or gauze and add jewels
 
 Here you are going to use your hardening mixture (glue, etc.) 


Dip the cheese cloth or gauze in the solution and wrap the chicken adding the beads (amulets) as you wrap.  Or you can wrap the gauze and brush on the solution.  Once you have completed it, then put it in a well ventilated area and allow to dry for several days.  (If you want them to paint it)

Now you have successfully mummified a chicken.  :) 


Tuesday, May 30, 2017

Florida On A Budget

I LOVE going to Disney, but it's so expensive so I get creative on our trips every year and find new things to do. I have created a list of things to do for FREE in several cities in Florida that our family did that week.  This trip we had a budget of $800 and didn't go over that.  We had already purchased our hotel we like to use several different travel links. (shown in another post)  How did we keep under $800?  We shopped at the grocery store for our meals and cooked at the hotel (around $150), during lunch we packed sandwiches, and set aside the amount of money we needed for gas which for us is $250 and the boarders for our animals.  We had $400 left for spending for a 7 day trip.  We like to stay in a resort in Orlando.  I've found that resorts if you watch them all year go up and down in price.  But the best times I have seen to purchase is for the months of Mid January to Mid March and Mid August to Mid October.     

Here is a list of FREE or Cheap things to do:

St. Augustine

San Sebastian Winery
157 King Street
St. Augustine, FL 32084
Stop by for a winery tour and have a wine tasting for free. 
 http://www.sansebastianwinery.com/

Old St. Augustine History Museum
Located near the Old City Jail
https://www.trolleytours.com/st-augustine/history-museum

Old Jail 
167 San Marco Ave.
St. Augustine, FL 32084
$9.00 Adult
$5 children (6-12)
Free (under 6)
Home of St. Augustine's most violent criminals from 1891-1953

https://www.trolleytours.com/st-augustine/old-jail

Holocaust Memorial Resource & Education Center of Florida
851 N. Maitland, Ave.
Maitland, FL 32751
Admissions is donations only
https://www.holocaustedu.org/
Kissimmee

 Osceola County Pioneer Village 
2491 Babb Rd.
Kissimmee, FL 34746
$7.00 Adult
$3 Children 3-12
We went on a FREE day, check their website for days available 
http://osceolahistory.org/

Osceola County History Museum
4155 W Vine St.
Kissimmee, FL 34741
http://osceolahistory.org/

Military History Museum
5210 W Irlo Bronson Memorial Hwy.
Kissimmee, FL 34746
$7.00 Adults
$6.00 Seniors
$5.00 Students
FREE Under 5 & Military
$4.00 Disabled Veterans
$5.00 Retired Veterans
https://museumofmilitaryhistory.com/

Old Town
5770 W Irlo Bronson Memorial Hwy.
Kissimmee, FL 34746
This is a nice place to visit.  They have rides, bars, restaurants, and shops here.  There is live entertainment on the weekends and it's a pretty cool place to visit.   
https://myoldtownusa.com/

Fun Spot American Theme Parks
2850 Florida Plaza Blvd.
Kissimmee, FL 34746
https://fun-spot.com/

Capone's Dinner and Show
4740 W Irlo Bronson Memorial Hwy.
Kissimmee, FL 34746
$35.46 +tax
$22.56 +tax
FREE Infant 3 and under with an adult
https://alcapones.com/

Dinner theater with a 30's gangland Chicago-themed show plus a buffet. We have been here twice and love it.  It's affordable with an all you can eat Italian-American buffet, 1 hour show, gangster style service, and all you can drinks including alcohol.  Not to mention it is so much fun to play gambling style games before the show starts and dress up like the 30's in flapper dresses and gangster hats.  They sale stuff on their website to help you prepare for your experience, but I purchased our flapper dresses off Amazon and went to the local Dollar Tree to get the boas and necklaces.  

**Don't Order by phone it's double the price, order online and save 50%!**


Orlando

Wonderworks
9067 International Dr.
Orlando, FL 32819
$29.99 Adutls
$23.99 Children
https://www.wonderworksonline.com/orlando/

Disney Springs
1486 Buena Vista Dr.
Orlando, FL 32830
I love to visit this place.  Tons of things to do here.  Unique shops, restaurants, balloon rides, bowing, movies, and much more.  
https://www.disneysprings.com/?CMP=OKC-wdw_themeparks_gmap_415

Dave & Busters
8986 International Drive 
Orlando, FL 32819
https://www.daveandbusters.com/locations/orlando