Total Pageviews

Showing posts with label DIY. Show all posts

Tuesday, February 5, 2019

DIY Mickey Mouse Ears

Here are some of the ears I did on our last trip to Disney World.  


This is the pattern I used to create the ears.  Print on a standard size piece of paper.


  • I cut out the pattern and traced it onto cardboard.  
  • I took a fabric marker and traced it around my cloth.  (Leave about 1/2 inch around the outer sides so you will have room to glue to the ear to make them.  
  • I glued the ends of the fabric to the cardboard along the edges to tighten it around the cardboard.
  • Then I placed the middle of it under the headband and folded down the ears to line up the tops of both ears.
  • Lastly I glued (or you can sew the ear ends together with a thick needle) to secure them together.

Here is a pattern to use if you want to set the ears together and cut out the cardboard to slide inside the ears.  https://dixiedelightsonline.com/2014/09/diy-custom-minnie-mouse-ears.html

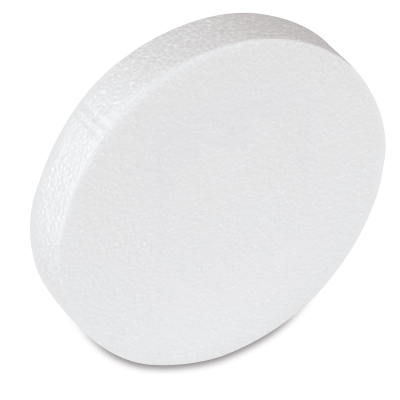
You can also buy the styrofoam flat round circles that look like disks like these   Disk, 6" dia and cut out off the bottom piece and hot glue cloth around it and secure the loose ends at the bottom of it.  Then glue it to the headband, but I didn't want ours to get squished in the suitcase.  Here is a link to show where you will cut the styrofoam.  https://pinkcakeplate.com/diy-sequin-minnie-mouse-ears/9/


Mickey Washer Necklaces


What you need:

2 different size washers
leather cord
paint
wire or some sort of rope
(I bought the rolls of rope at the dollar tree-they come in packs of 4)

Directions:

  • 1st, I painted the washers black
  • Next, I used the two smaller washers and wrapped colored wire/rope around and around until I got it tight enough it wouldn't move.  Glue the end at the back of the washer. (Repeat on other side to form the ears)
  • Next I cut the desired amount of leather cord needed for your necklace.  
  • Now, put both ends through the center circle of the washer.  Before  the bottom of the leather strap goes through the washer, loop the two ends around the washer between of the two ears and run it through the leather cord opening and pull up to tighten.  This will form the knot shown above to secure it to the washers.
  • Tie the two loose ends in a knot to wear it around your neck. 
If you have any questions or find my directions confusing message me here.  Get creative and add bows, jewels, or like I did shown above to make it look like a pirate.

Saturday, February 2, 2019

Dyeing Fabrics


For this project we went to our local Hobby Lobby and picked up a canvas bag.  We were studying our Little House on the Prairie Unit Study and did a few projects as we learned different things about Laura Ingalls Wilder and how she lived. 

What you will need:

canvas bag/shirt/etc 
blueberries
candle
pan

Directions:

1-Bring the berries to a slow boil and let it simmer for about 30 minutes
2-Let cool 
3-while you are waiting it to cool, take a long stick candle and light it so that the wax starts to run.    drip it over your material to form a design and take a toothpick or cheap tiny paint brush and              smooth it out to the desired design
4-Let the wax cool
5-After the dye has cooled, drain the berries 
6-Dip your material into the liquid dye and let it sit for 15 minutes to an hour.  The longer you leave it in there, the darker the color will be 
7-Set aside on newspaper so it won't dye your counter tops and let sit until it is fully dry
8-wash inside out in cold water before using and/or washing with other clothes


Saturday, May 27, 2017

Freezer paper stencils

So who doesn't love new clothes when we are going somewhere exciting?  For me it's cruising and Walt Disney World.  I don't like to wear the same clothes when I go to those places because I know there will be hundreds of pictures taken.  Unless you have one of those expensive DIY cut machines it's just not affordable to buy tons of new shirts for your family.  I always try to talk my husband into doing matching shirts when going to Disney and he just doesn't take the bite.  So I started making my own shirts to support my habit of not wanting to wear the same thing each time we go.

How do you keep it under $5?  You shop clearance racks when they are closing out Summer and Winter Seasons.  If you don't have enough time to plan for that then you can get t-shirts in the craft department from Walmart for less than $4.  I use the $0.50-$1 paints from Walmart as well.  Get creative too.  I use glow in the dark paints, glitter, etc.  Your biggest expense will be the freezer paper which usually runs around $8 for a big box.  But it lasts a long time because you don't need much when you do it.  Only the size of the image you will be cutting out, so no need to waste it.

Its really easy but time consuming so you will want to work on it a month or so before you leave for your vacation.


You will need the following supplies:
  1. Freezer Paper
  2. Paints (fabric paint works best, but I have used the $0.80 ones from Walmart and they last a while)
  3. Shirt, Pants, Jacket, Cloth tennis shoes, Backpack, etc. that you want to paint
  4. An image you want to paint
  5. Scissors
  6. Paintbrushes or foam brushes
  7. Hairdryer
  8. X-Acto Knife 
  9. Frame matting
  10. Marker
  11. Tape 
  12. Cardboard
  13. Iron or heat press
                                                                                                                                     Instructions:
  1. Print out the image you want off the internet (silhouettes work best)  
  2. Tape the image on a window, place freezer paper on the shiny side down on top of the image.
  3. Trace the image.  Be sure to color all of it in because you will need those wide lines to cut.
  4. Use an x-acto knife and cut out all the black off the paper you traced
  5. Iron the image (Shiny side down) onto your shirt like shown in the image below.
  6. Place cardboard inside the shirt so the paint won't leak through.
  7. Paint the image then use a hairdryer to dry the paint.
  8. Peel the freezer paper off and ENJOY!


This next set of images were a little more time consuming because I used several paints to get the effect I wanted.  It turned out pretty awesome.  


Tinkerbell was done a different way.  See instructions above, but instead of throwing out the black pieces you cut out keep those and throw away the big piece of freezer paper.  (I always use both so I can get a two for one on painting shirts for my family).  You will have to iron down a few pieces at a time so they won't slide while you are trying to iron them down.  Then you take the paint brush and paint over the pieces and brush out.  I like to use matting frames now because in this one below because Tinkerbell had an odd shape and it wasn't even on both sides of her body it didn't form a perfect circle.  When using the matting it is best to use masking tape to tape it down so the paint won't leak under it.  


One other technique to try is after you iron on the freezer paper, instead of painting it I used clorox in a spray bottle and created this look.  You will need to place cardboard inside the shirt to make sure the clorox doesn't bleed through to the back side.  

We used this one for a Carnival Cruise Breakfast.  It was so much fun.  

Test it out on different things and textures too.  I tried them on a pair of cloth tennis shoes.  Happy Painting!